

How To Fight Like An Anime Character
This tutorial explains the basics of drawing dissimilar poses. The instructions it provides can apply to anime and manga or to more traditional art styles.
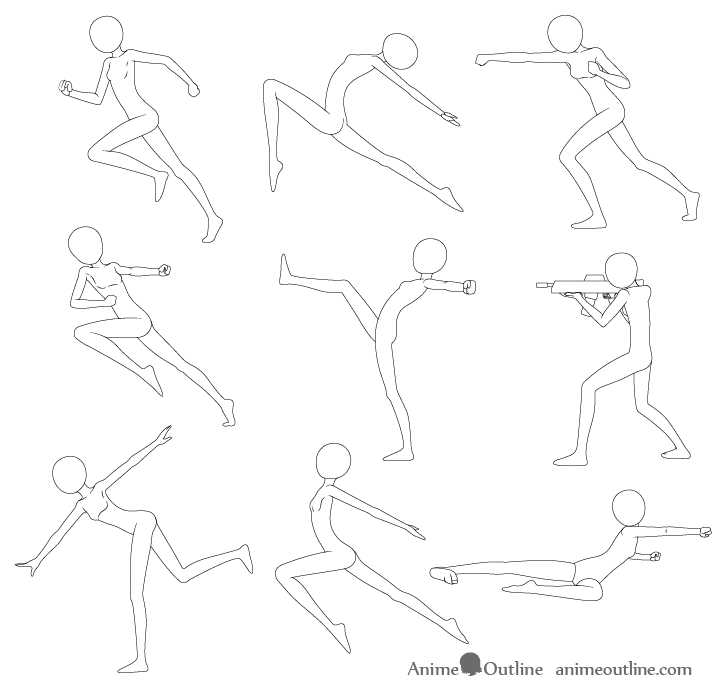
Cartoon an anime or manga character in a given pose can be quite challenging. To make things simpler (especially for beginners) this tutorial shows examples from adequately piece of cake to depict angles. It as well show how to use mannequin similar characters for getting the pose without any of the details such every bit the facial features, clothes, hair, etc…
The "mannequin arroyo" mentioned earlier lets you draw various poses quickly making it easier to discover the right one for the character you lot want to draw. It can also help avoid having to practise excessive erasing in case of a mistake.
If for example you fully draw out the details of the head and and then move on to the body you may realize it does not quite accept the right bending. This means at present having to erase all of the facial features when you lot could have caught the fault much sooner if you were to describe a basic outline of the entire body.
For more than mutual drawing mistakes and good practices likewise see:
- Common Mistakes When Drawing Anime & Manga
- Beginner Guide to Drawing Anime & Manga
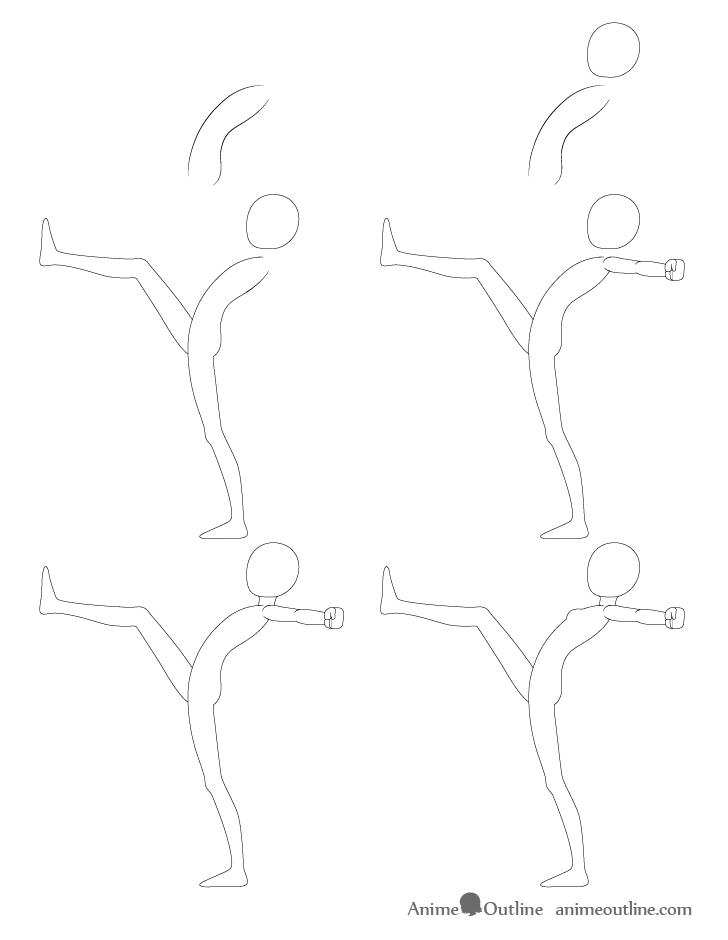
Importance of Proper Poses
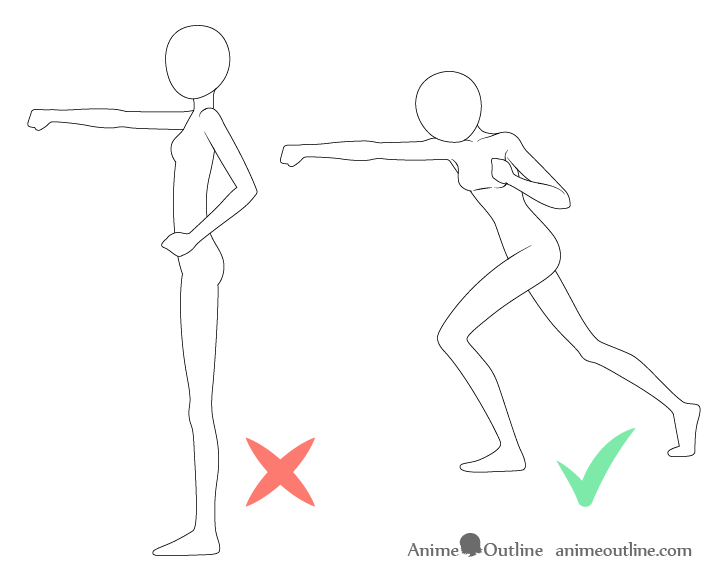
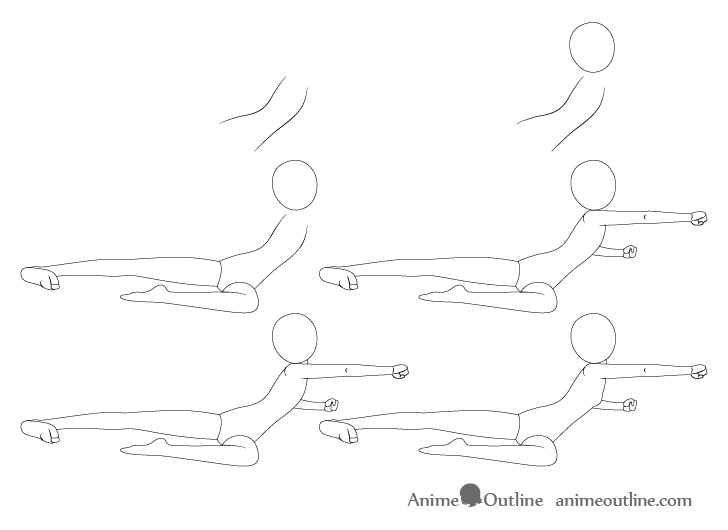
Fifty-fifty if you are a reasonable expert artist an improperly drawn stance can greatly detract from your drawing and the bulletin your are trying to convey to the viewer.
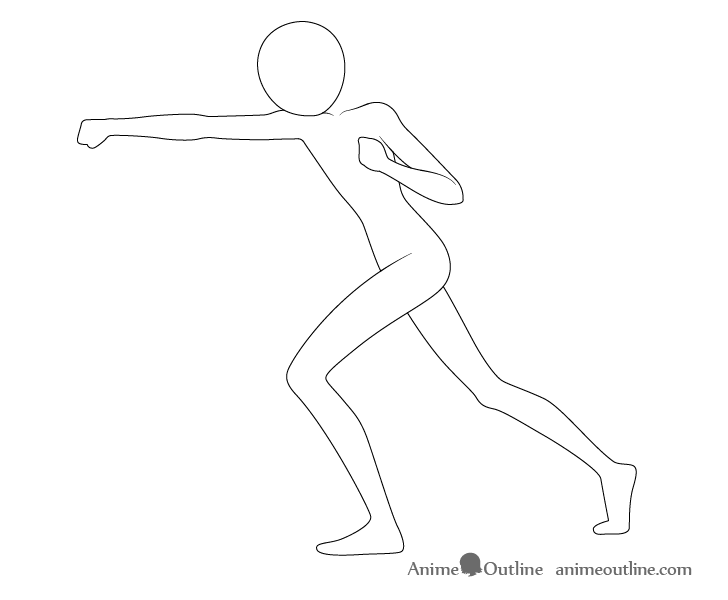
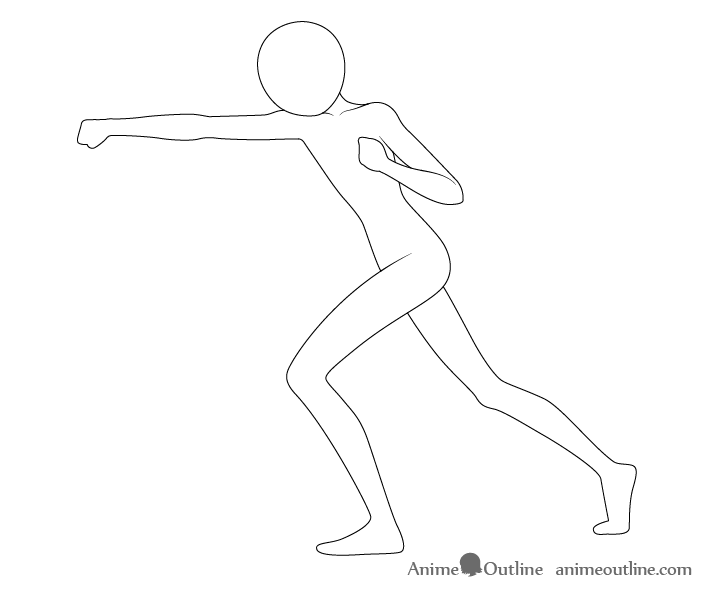
For example in the two punch drawings above the first one looks like a person holding their arm out while the second looks similar they are really punching.
It's very of import to properly convey the action or opinion you want to show. Without that an even otherwise well done drawing won't look correct.
Drawing Specifics of this Tutorial
For the more than generic/common styles of anime and manga the bodies tend to be drawn similar to those of real people. This is how the examples in this tutorial will exist drawn likewise. The only existent difference is a slightly larger and rounder head (as is common in anime).
This means drawing as follows:
- Head like in shape to an egg (slightly rounder)
- Easily drawn with fingers combined into i shape (sort of like mittens)
- Feet drawn as ane combined shape (like when wearing socks)
Though it'south quite common to start the drawing of a person from the head the examples in this tutorial will get-go with the torso. In more dynamic poses getting it's bend and/or twist first can make it much easier to place the rest of the body parts.
Some other important matter y'all should do is draw light lines that you can easily erase (if drawing on paper). This volition make corrections easier in case y'all brand a mistake and information technology will also allow you more easily erase parts of the "mannequin" if y'all desire to add all of the details mentioned earlier over top of it. The lines in the examples have been made dark just then that they are easier to encounter.
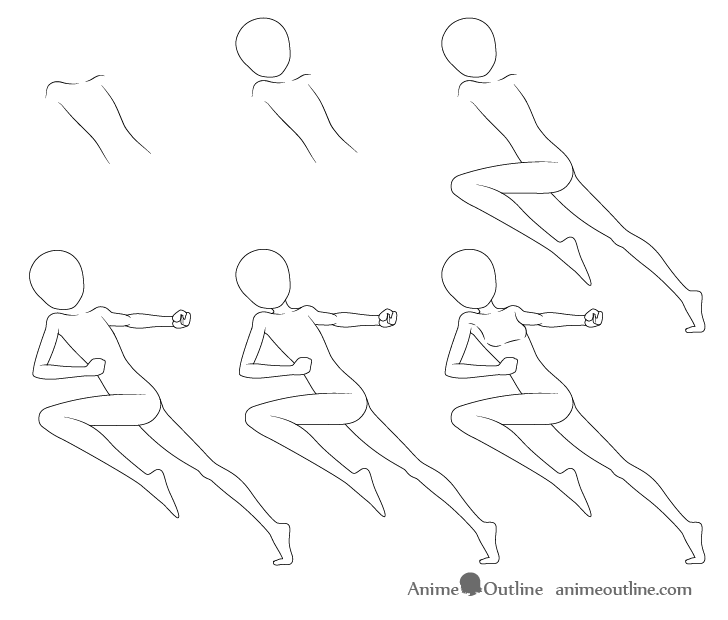
Drawing a Running Pose
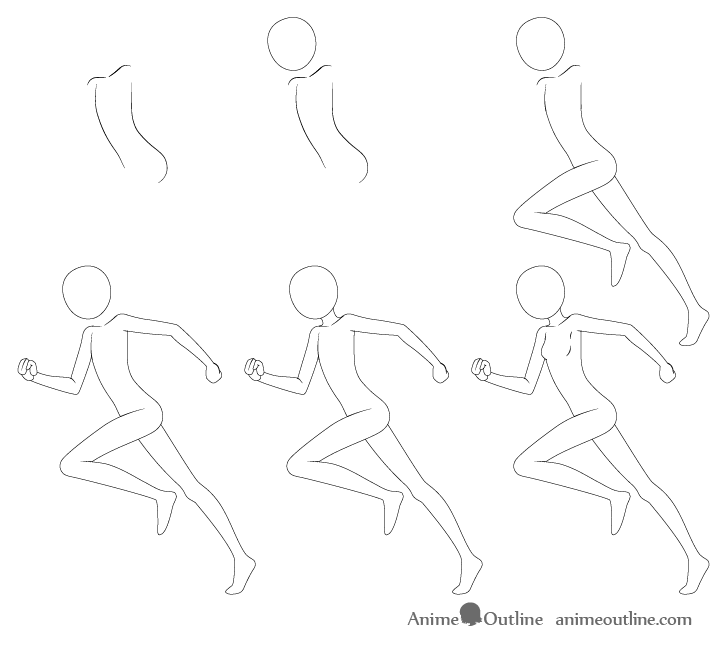
There are several common variations of running poses. A lot tin depend on the blazon of grapheme/event y'all want to portray. This particular pose is suited to sports.
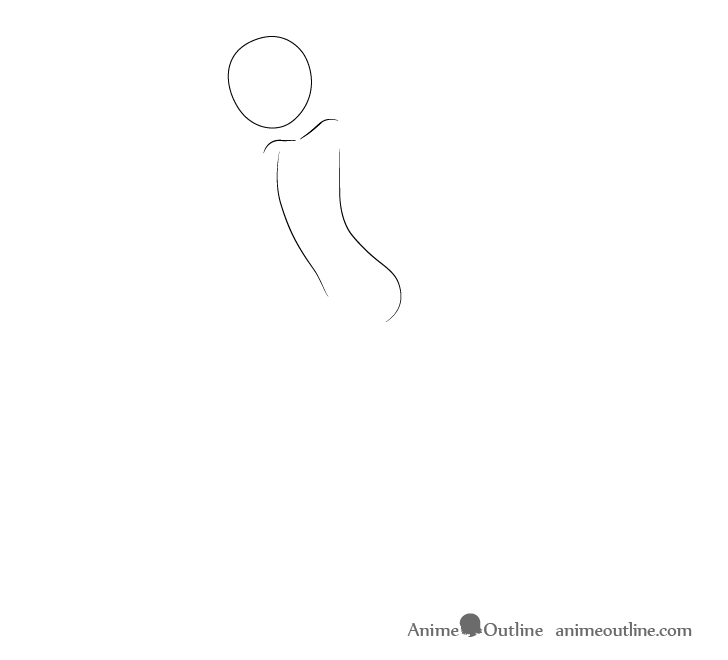
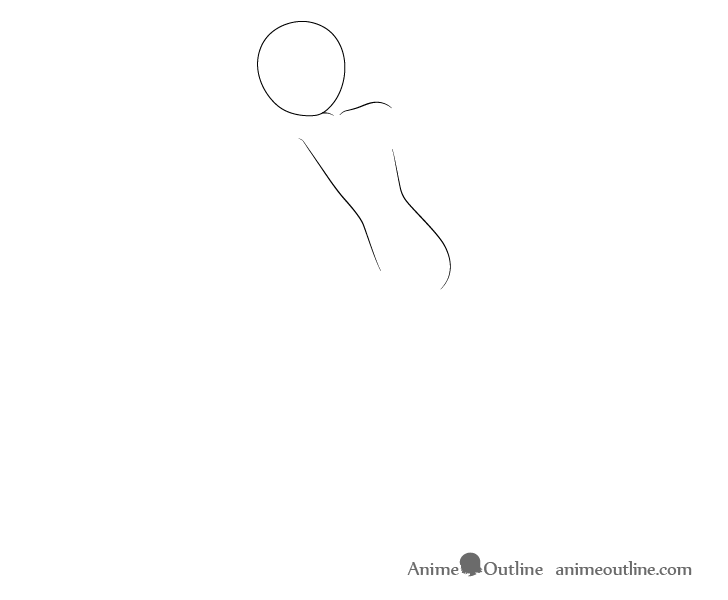
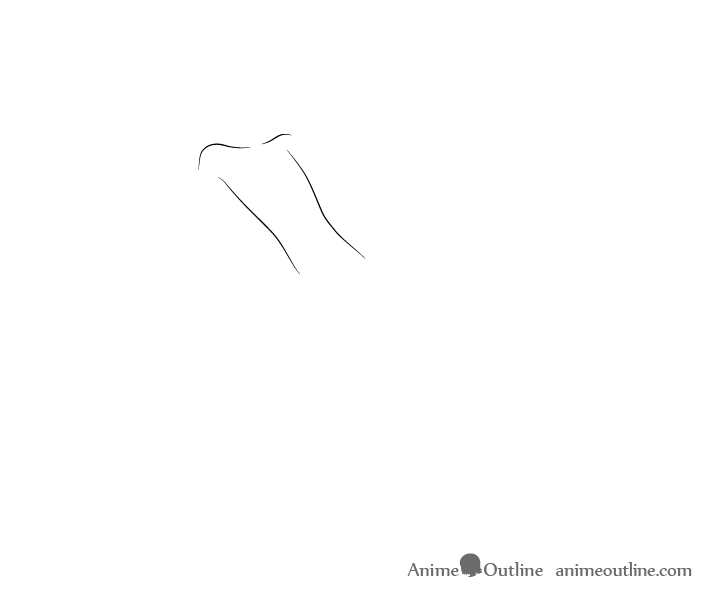
Step ane – Draw the Trunk
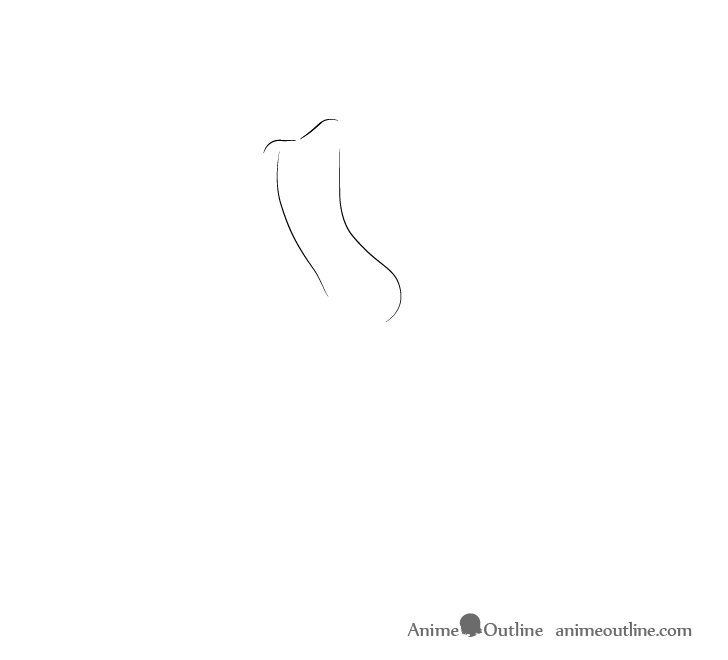
In this detail pose the torso will be fatigued at about 3/4 angle. Equally this is a female grapheme draw it with a bit of an hr glass similar shape.
To show that the grapheme is running position the torso leaning slightly forward. You can besides draw a hint of the shoulders/collar basic to define it'south upper role. In this pose the shoulder closer to the viewer will be slightly to a higher place.
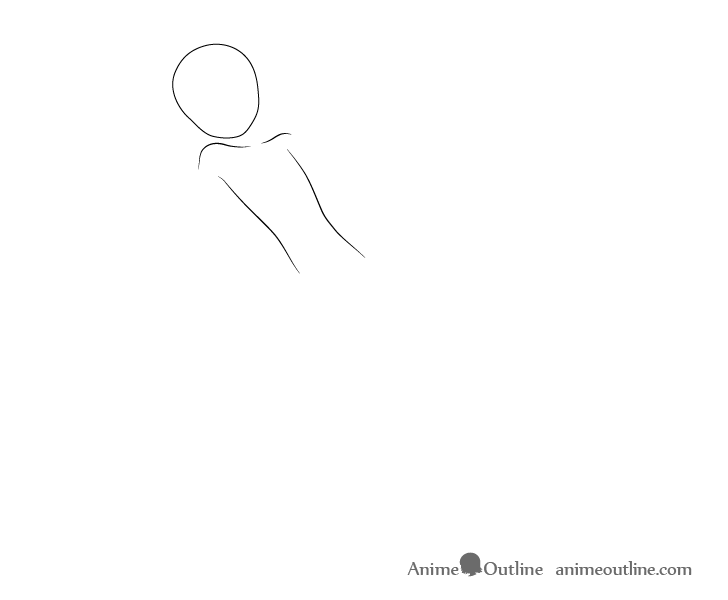
Step 2 – Draw the Head
Draw the caput leaning forward at pretty much the same bending every bit the torso.
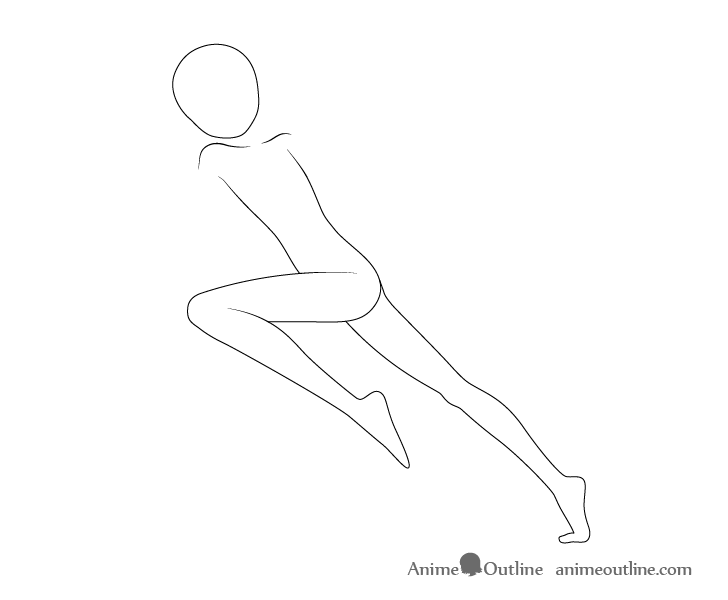
Step 3 – Draw the Legs
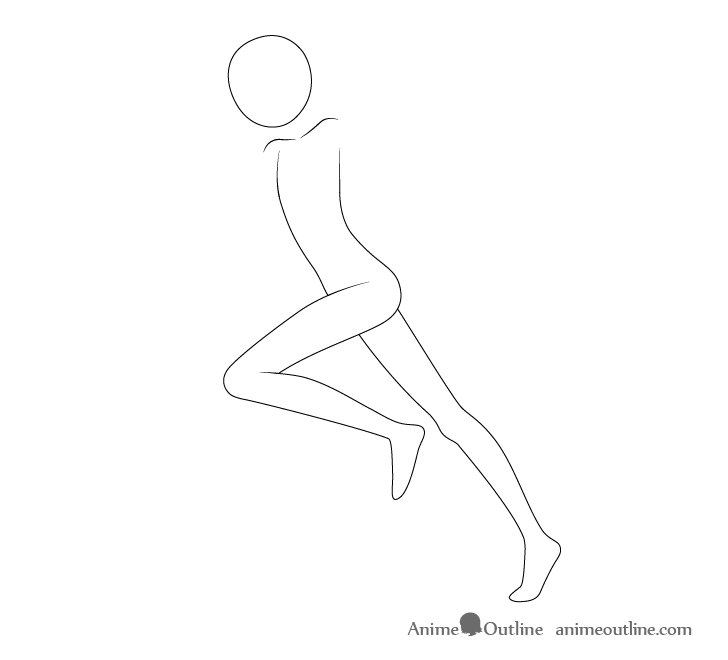
Depict the legs with i being bent into a sort of forward facing arrow (helps emphasize motion) and the other straight at near the same bending every bit the trunk.
The human foot on the bent leg can exist drawn in a adequately natural/relaxed position. The foot of the stretched out leg will exist pushing off of the footing and should be on it's toes.
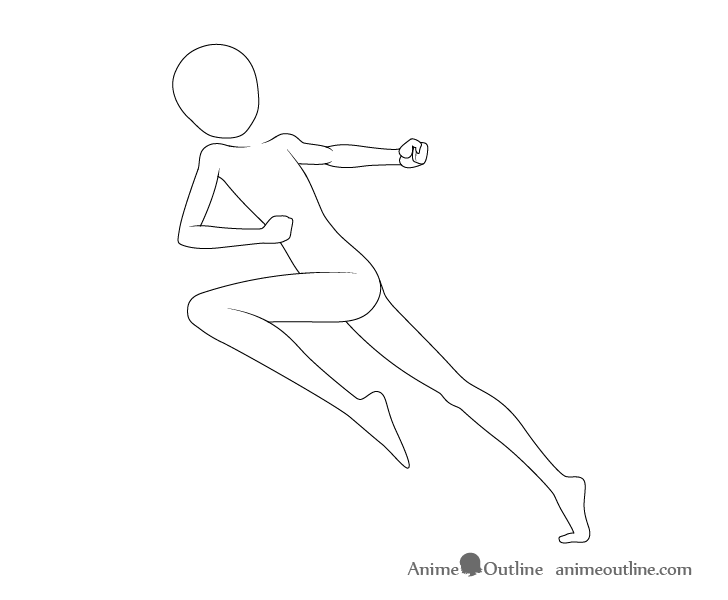
Step iv – Draw the Arms
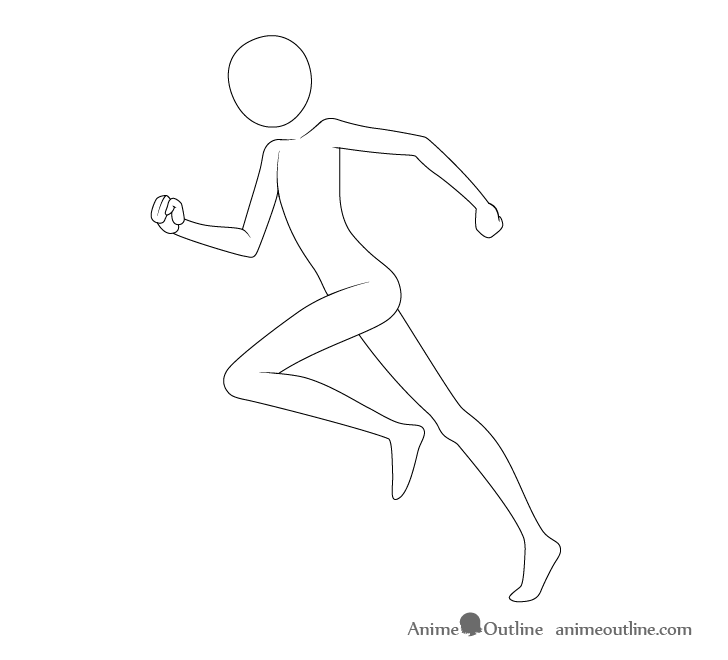
Depict the artillery swinging in the opposite direction of their corresponding legs. For example if the left leg is going forward the right arm should swing backwards and vise versa.
Each arm should exist bent with the hands clenched into fists. Equally already mentioned you can simply draw the hands as though they have mittens on them (no individual fingers).
For more on drawing hands run across:
- How to Draw a Handshake Pace by Step
- How to Describe Manus Poses Step by Step
Step five – Draw the Cervix

Draw the neck at pretty much the aforementioned angle as the head/body with roughly the same thickness equally the upper part of the arms.
Step 6 – Draw the Chest Details
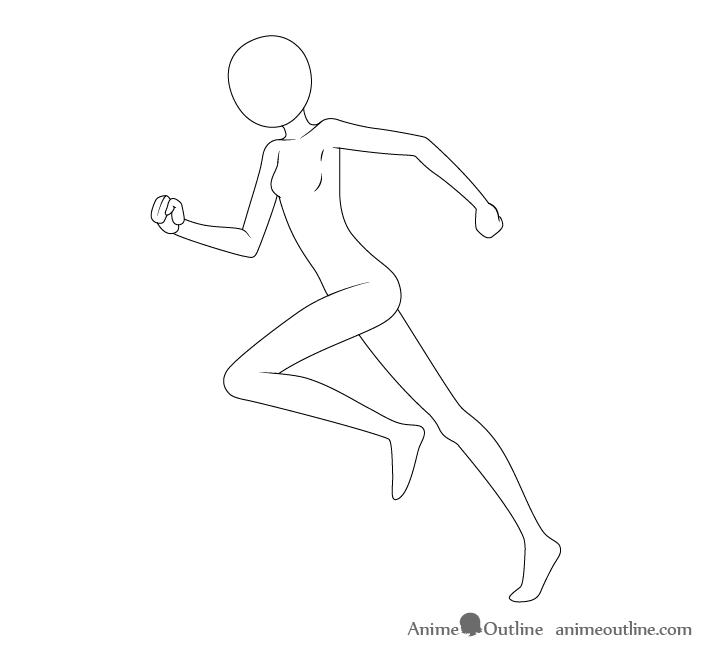
As this is a female character yous can add some basic details of the breasts to stop the pose. Keep in mind that by and large characters will exist wearing clothes which volition squeeze the breast area making information technology flatter.
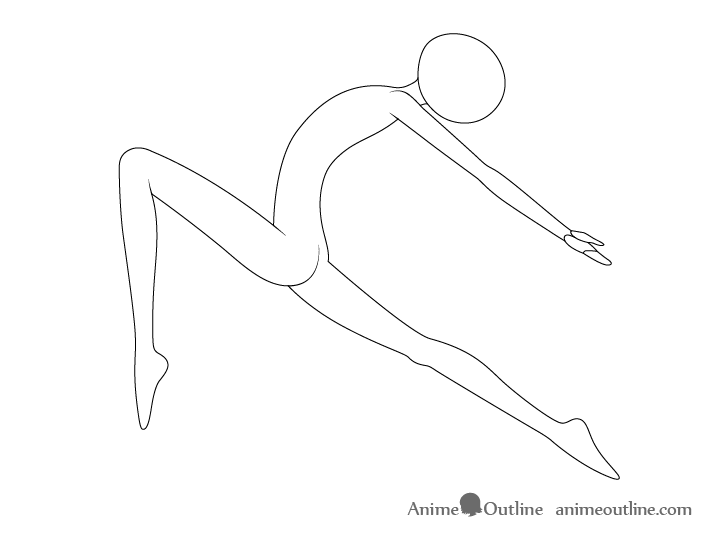
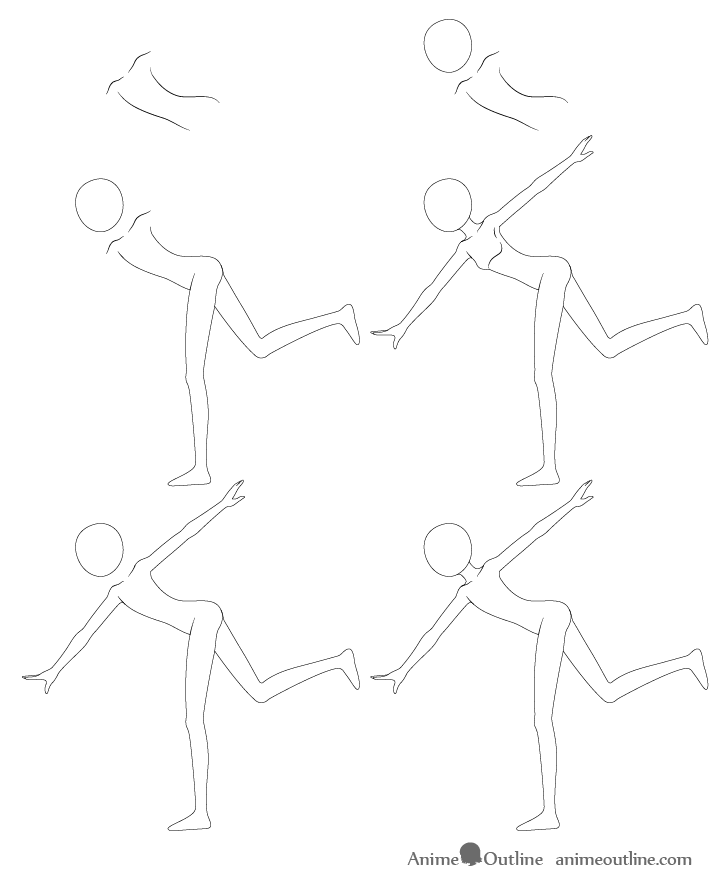
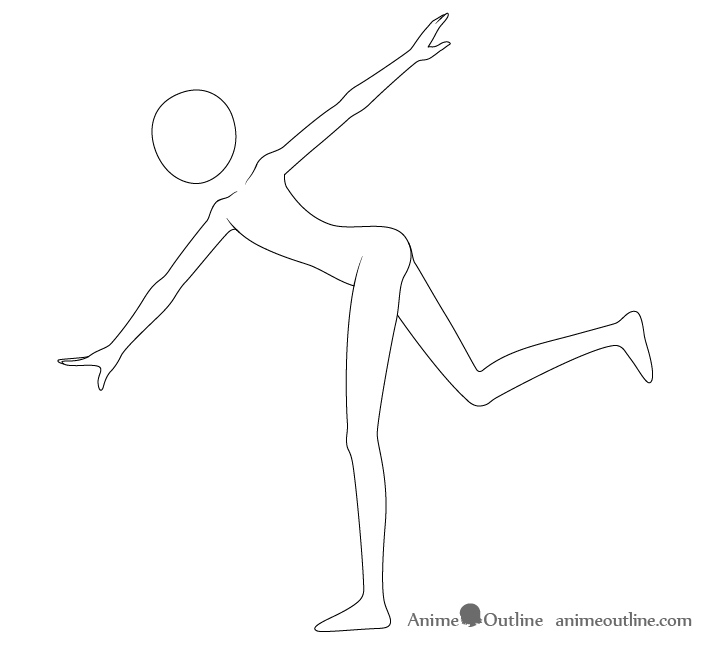
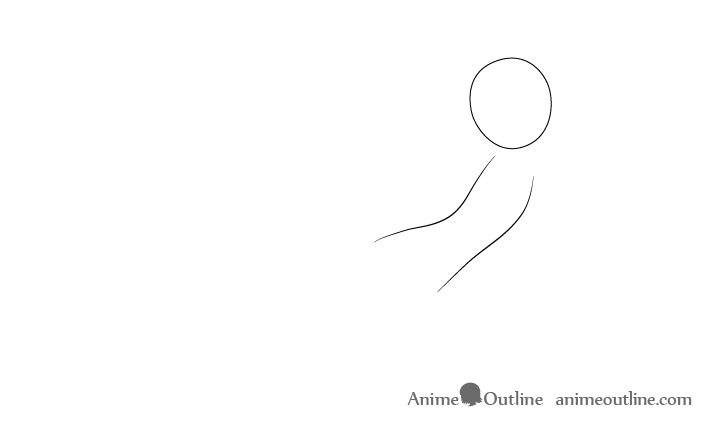
Drawing a Ballet Pose
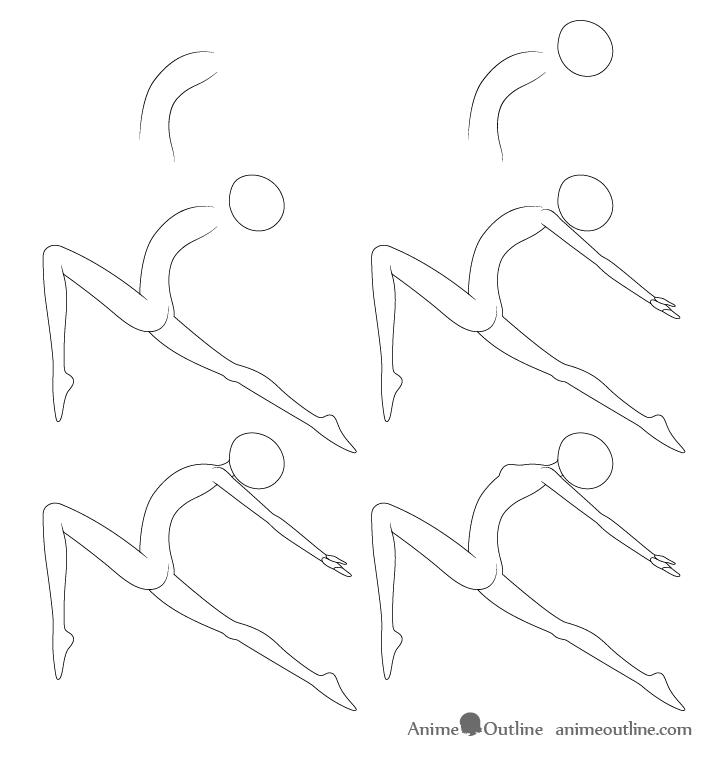
This pose is very characteristic of ballet dancers as it shows flexibility with the divide of the legs equally well as a bit of an artistic motion with the pulled back head.
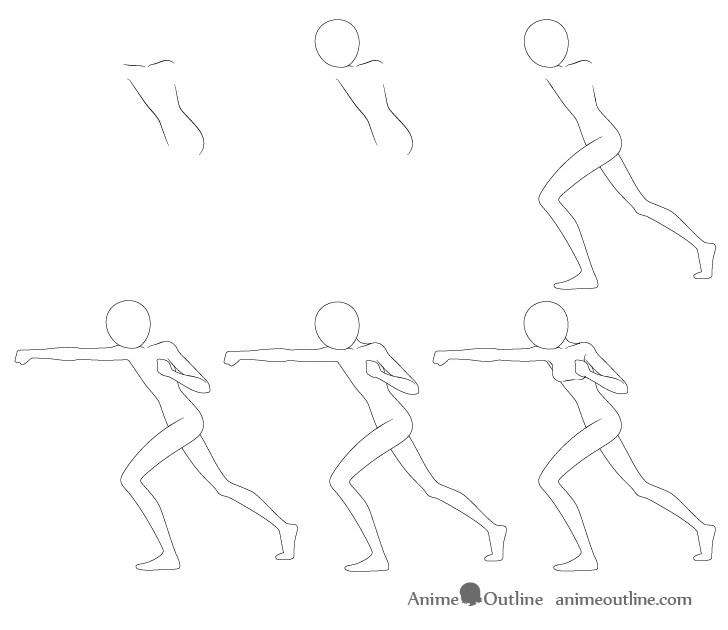
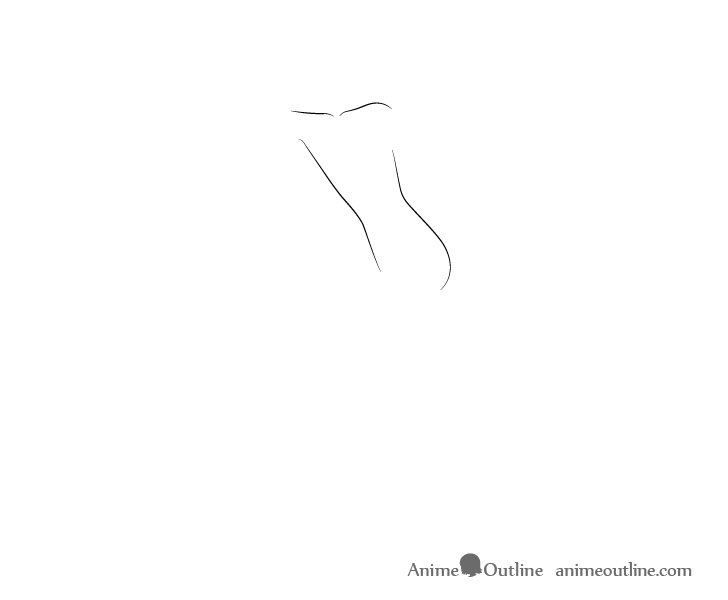
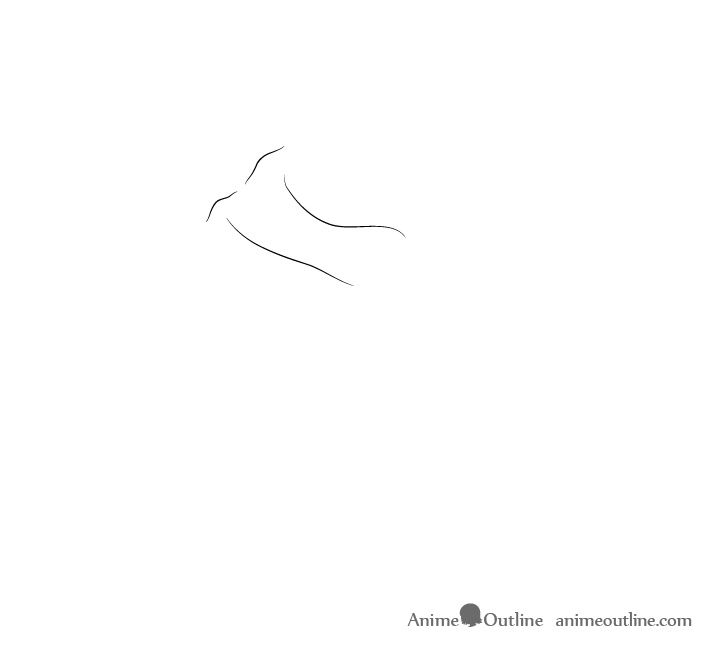
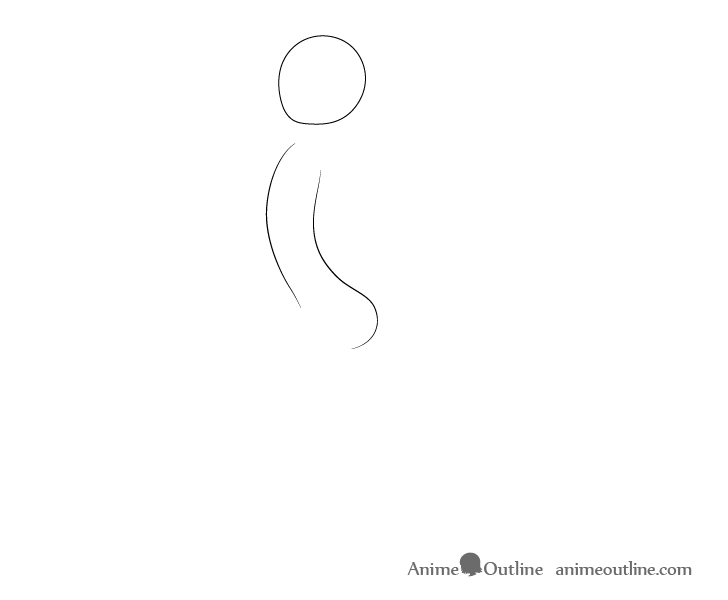
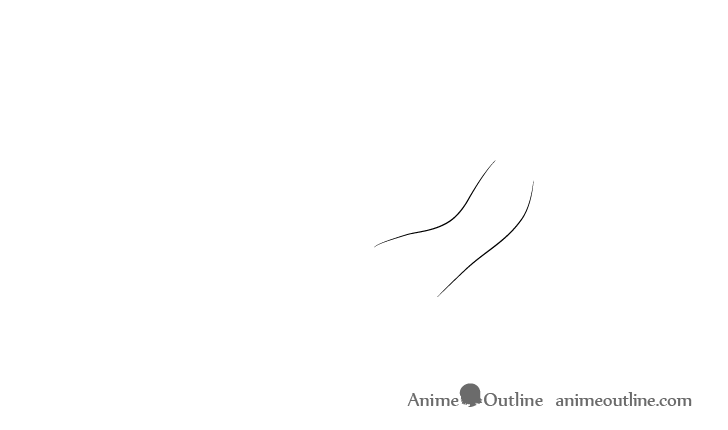
Pace 1 – Depict the Torso
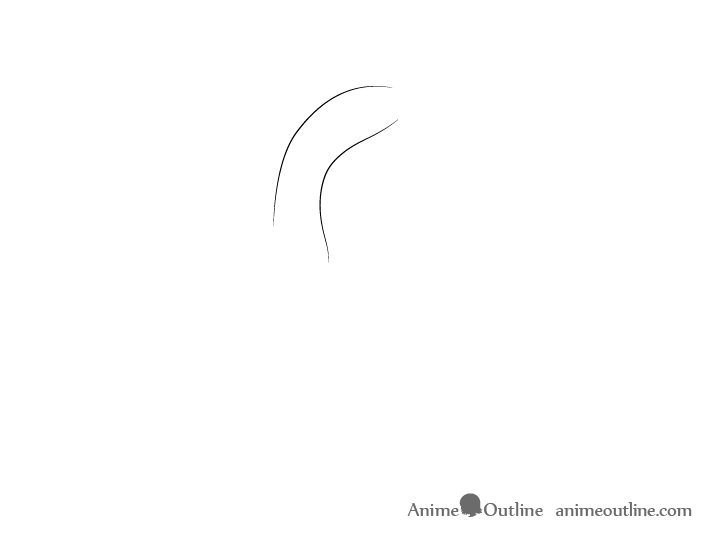
Draw the trunk angle backwards and make information technology slightly narrower in the heart (curving in at the back) equally compared to the tiptop and bottom.
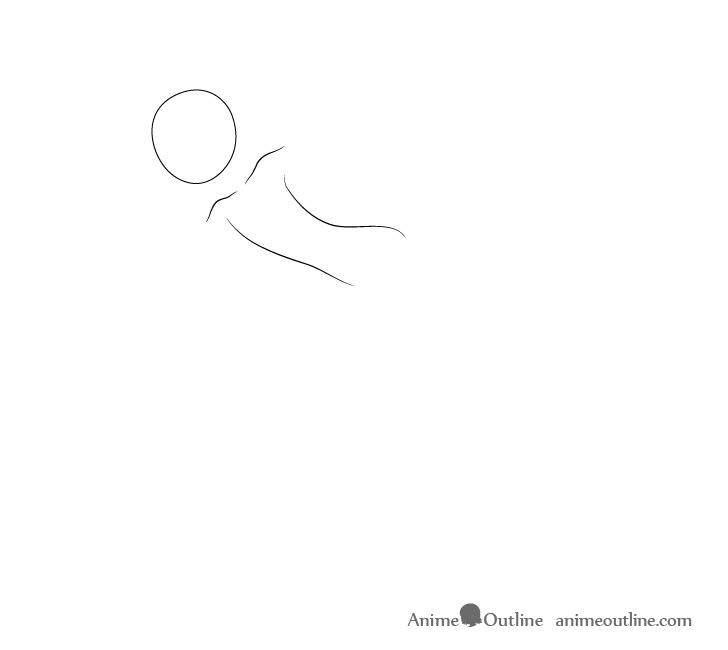
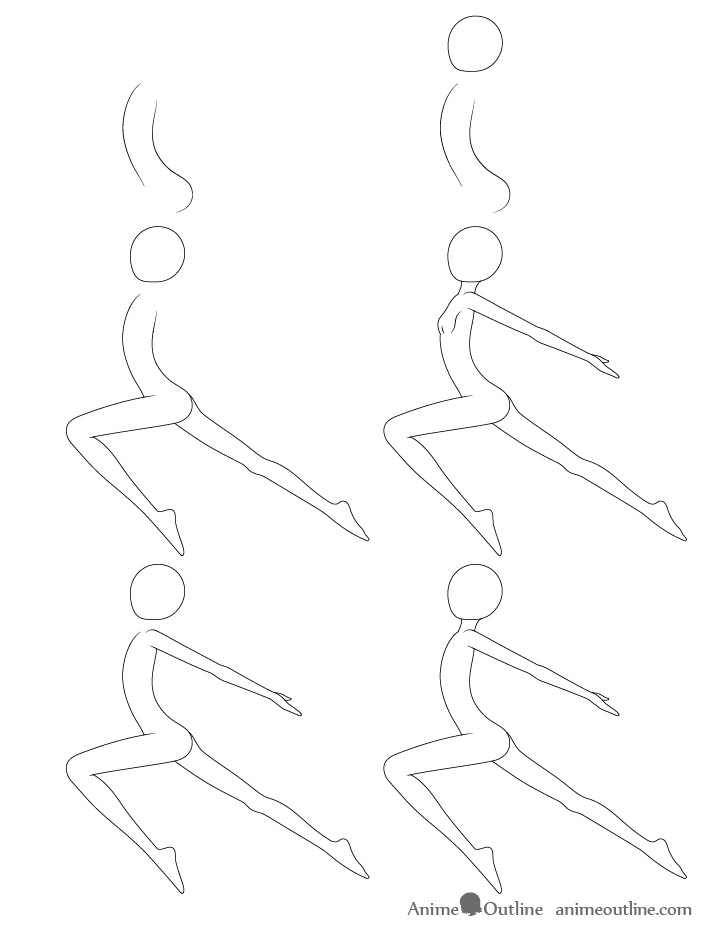
Stride 2 – Draw the Head
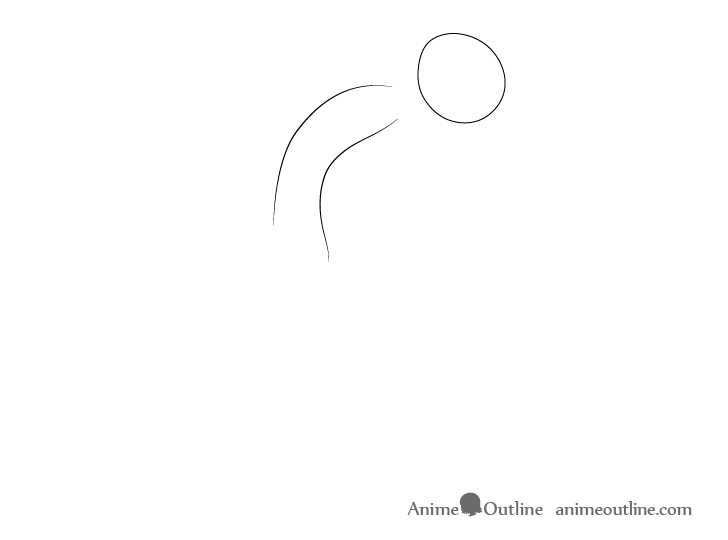
Draw the head tilted far dorsum (well-nigh upside down) with the chin pointing upwards.
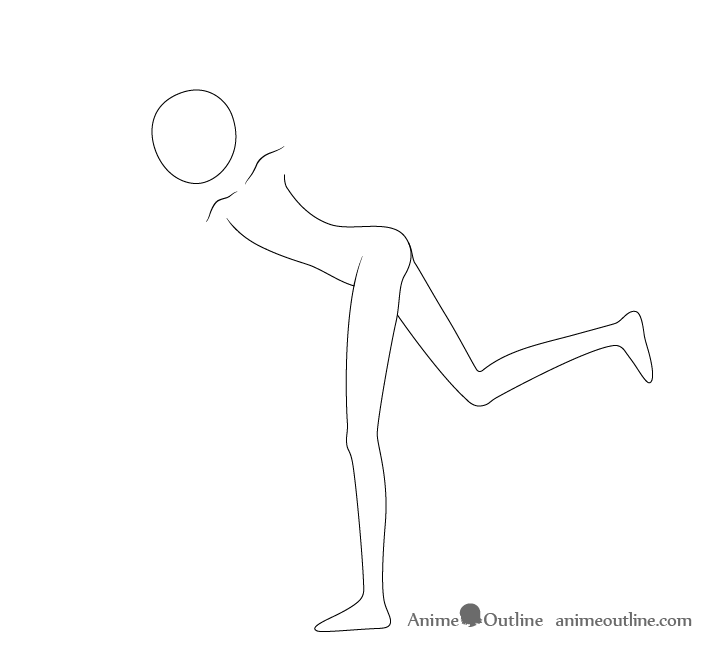
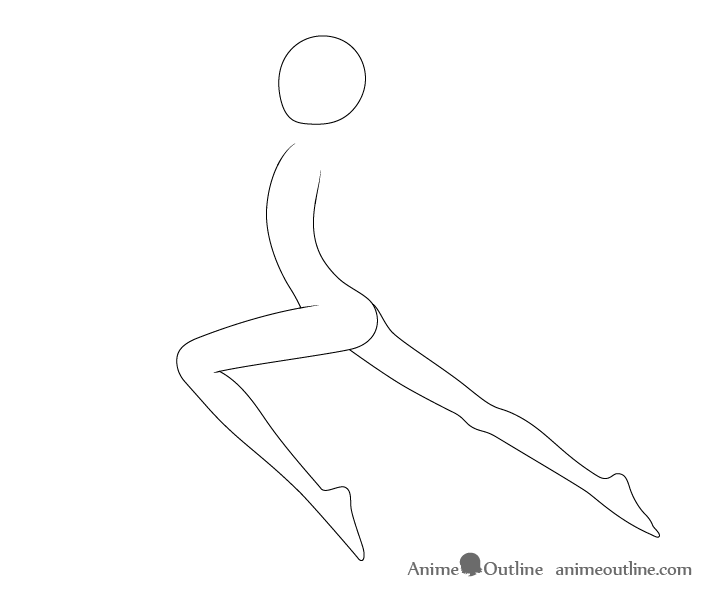
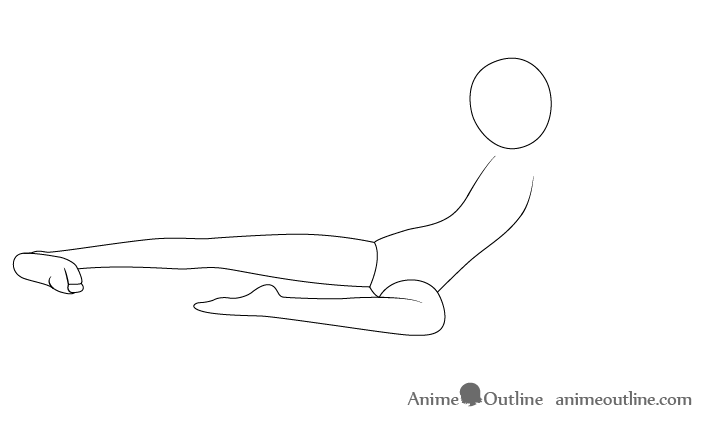
Stride iii – Describe the Legs
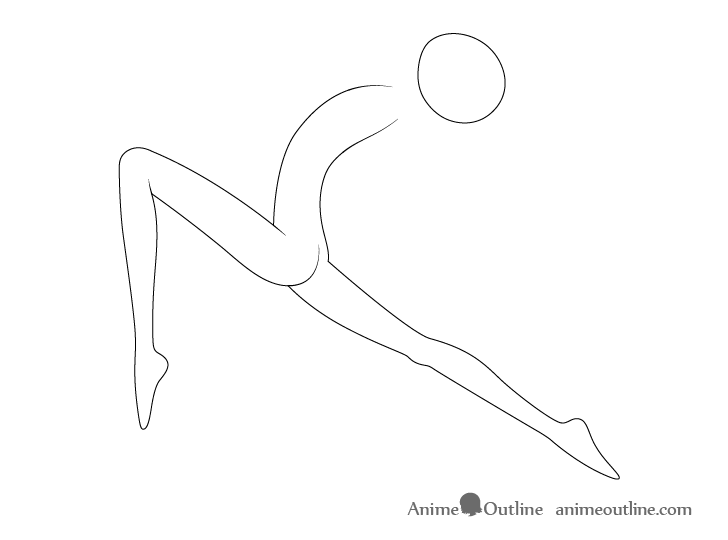
Describe the legs as as though the character is doing a divide just with the front end leg bent.
Draw the feet aptitude backwards like when the ballet dancer is continuing on their toes.
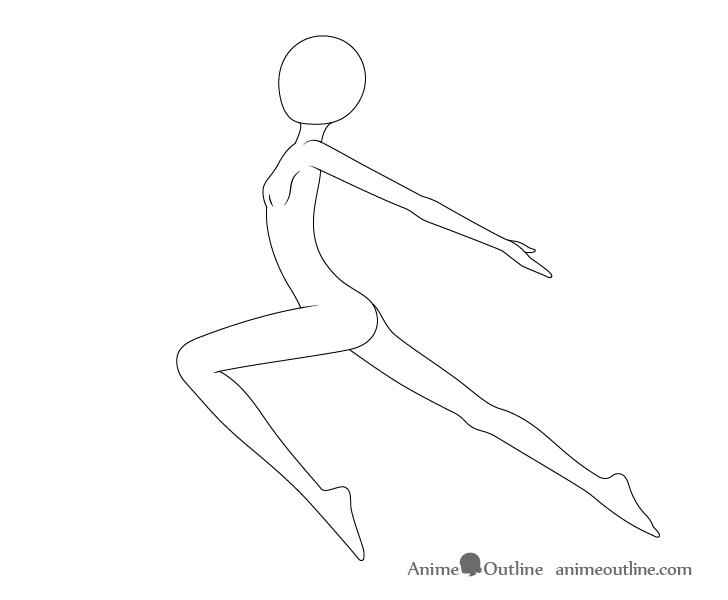
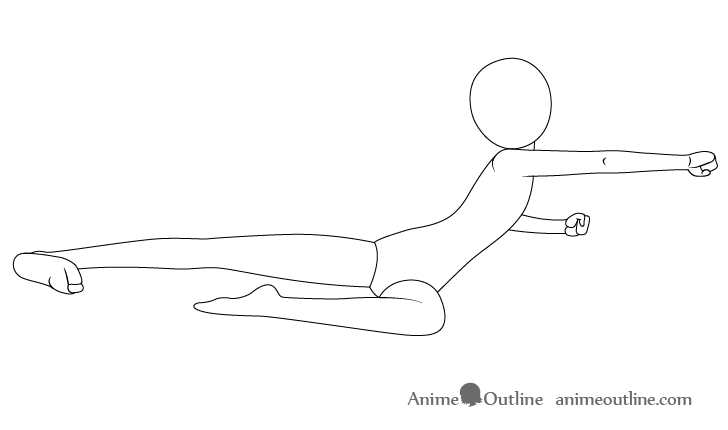
Step 4 – Describe the Arms
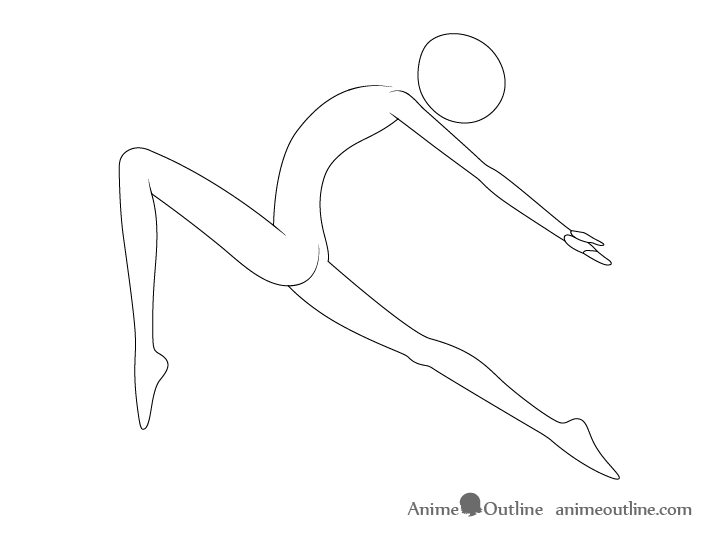
Draw the arms (or arm in this case) stretched out backwards with the palm of the paw existence held up.
Though you could also draw the back arm it'due south not actually needed in this case equally it can be pretty much hidden behind the forepart arm.
Step 5 – Describe the Neck
Depict the neck with it's angle pretty much matching that of the upper part of the trunk. In this pose information technology will as well be somewhat covered by the shoulders.
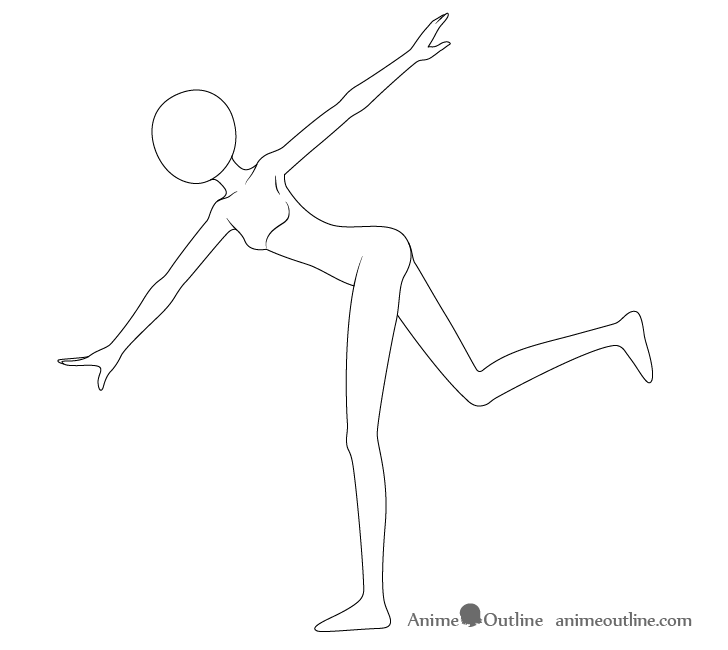
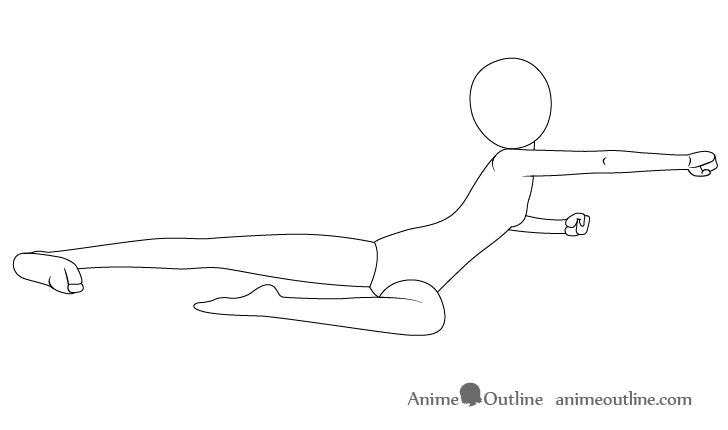
Step 6 – Draw the Chest Details

The chest will exist both stretched out and squished by the clothes (if they were drawn) and then depict information technology fairly flat.
Drawing an Punching Pose
This pose is well suited to a boxing punch. Especially when hit a bag during a workout.
Footstep 1 – Draw the Torso
In this case the torso volition exist shown at about 3/4 view (similar to the running pose). Draw it with a slight hourglass similar shape feature of a female character. You will also want to draw it leaning forward to evidence that the character is putting their weight into the punch and non simply holding their arm out.
Stride 2 – Draw the Head
Draw the head tilted forwards and lower downward (basically tucked in).
Step 3 – Draw the Legs

Draw the legs with both of them slightly bend (more so for the front leg) and a good distance apart. Brand the forward leg stand flat on the ground with the backward leg being on it'south toes.
Step 4 – Describe the Arms
Draw the punching arm extended frontwards (hand in a fist) with the other arm pointing slightly backwards and it'due south manus basically clenched to 1 side of the chest.
Footstep v – Draw the Cervix
Draw the neck tilted slightly more forrard than the angle of the body with it'southward front part subconscious by the chin.
Pace 6 – Depict the Chest Details

You tin can draw the breasts adequately normal slightly to one side of the chest to bear witness that it's beingness viewed on a angle. Again simply accept into account that they will be squeezed by the clothes.
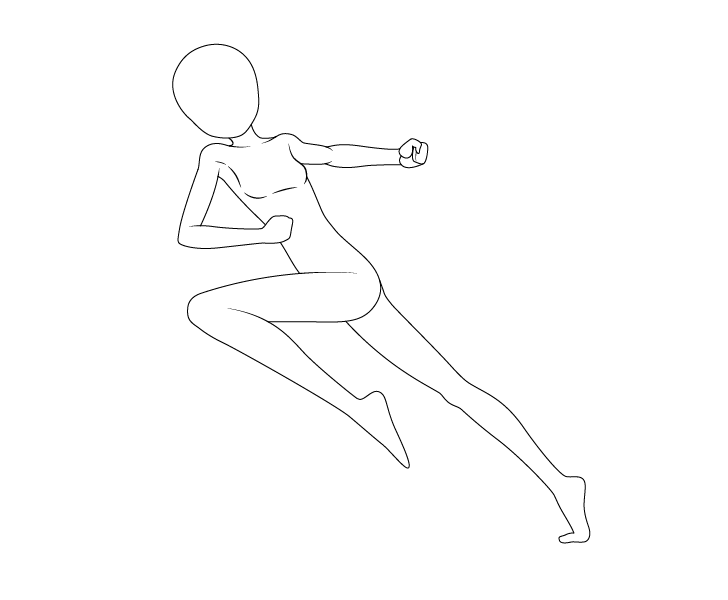
Drawing a Dashing Pose
In this pose the character will be dashing forrard winding upwardly a strong punch. You can as well practise a like pose if for an attack with a weapon like a sword or a social club.
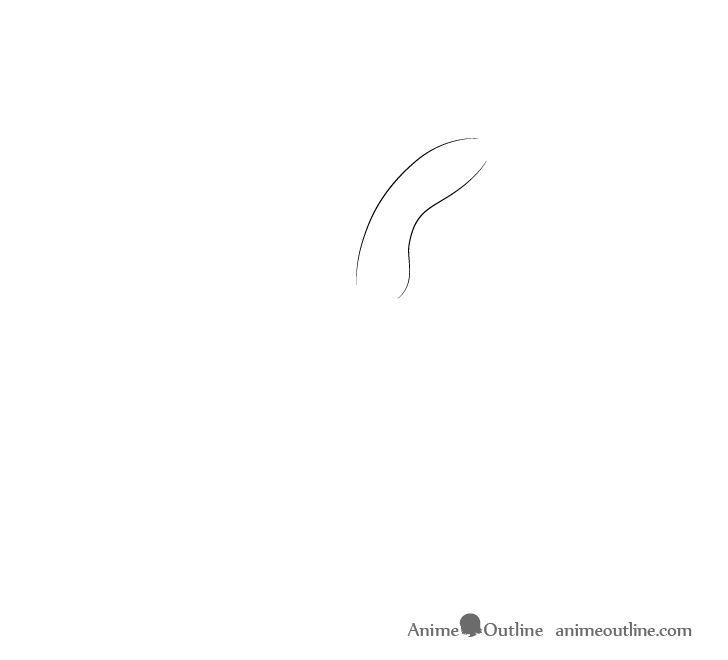
Step 1 – Describe the Torso
Like some other poses in this tutorial the entire body will again lean forrad. As the grapheme is swinging ane arm backwards the torso will be twisted to face up very slightly in the opposite direction to that of the dash. This blazon of pose may be slightly less realistic equally it will probably be quite hard to mimic in real life but erstwhile some exaggeration can assist make a pose wait more than dramatic.
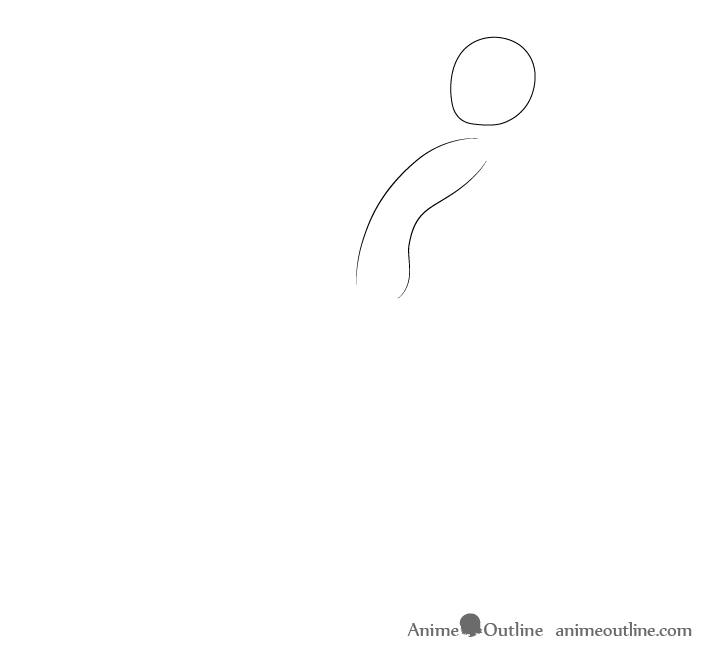
Pace 2 – Draw the Head
The head will be tilted forward just like the trunk (also facing the viewer) so draw it every bit shown in the example.
Step 3 – Depict the Legs
Similar to the running pose the front end leg will be bent pointing forrard with the back leg existence straight and on the same angle equally the rest of the trunk.
Describe the foot on the front end leg tilted backwards so that it's aligned with the leg.
Draw the hands clenched into fists.
Step four – Describe the Artillery
Draw the forrard facing arm bent and so that information technology's elbow points forwards (sort of a reverse bent of the frontwards leg). The back facing arm in this case will be scrap tricky as it'due south bent backwards equally the character is taking a swing. To show this curve describe the elbow to shoulder office of the arm slightly shorter and project information technology's outlines to "cutting" into the elbow to wrist part.
Footstep five – Draw the Neck

Draw the neck on pretty much the same angle every bit the body.
Pace vi – Draw the Chest Details
To show that the body is slightly twisted depict the breasts a piddling bit more towards the right of the picture.
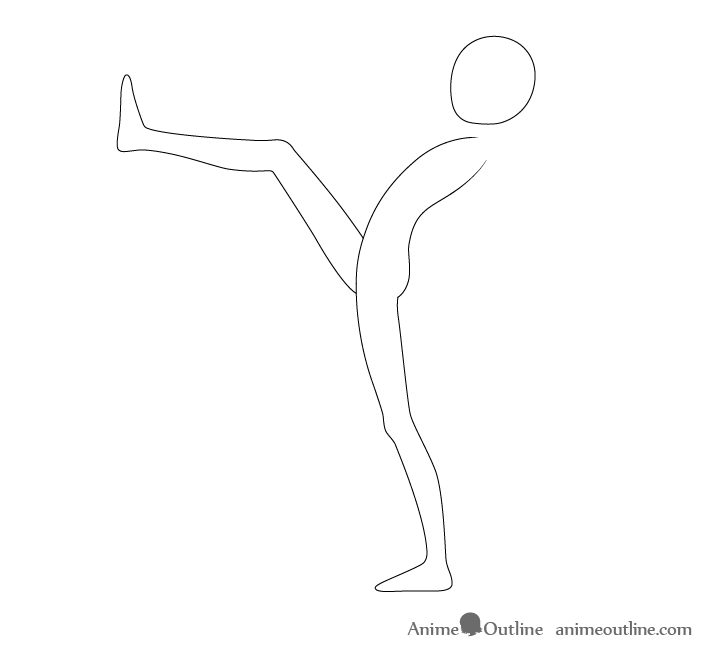
Drawing a Kicking Pose
This is a straight up frontwards boot similar the character is trying to kick something down.
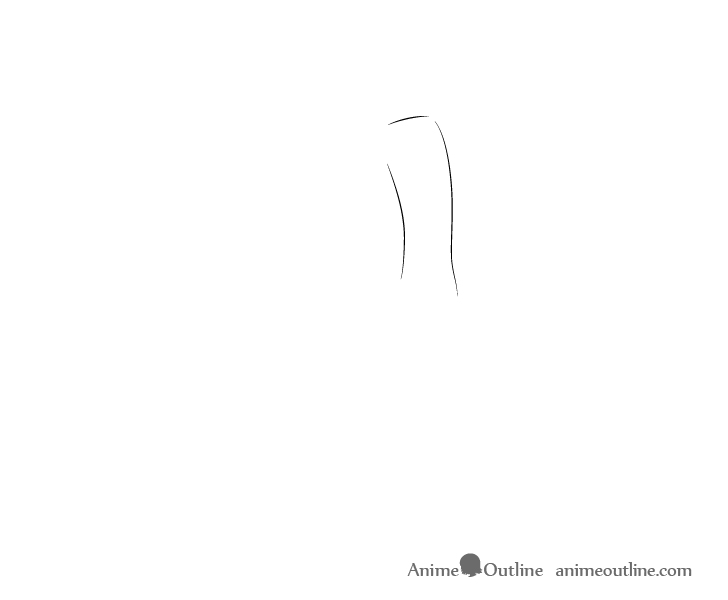
Step 1 – Draw the Torso
Draw the torso angled and slightly bent backwards. Go far narrower towards the eye/back expanse.
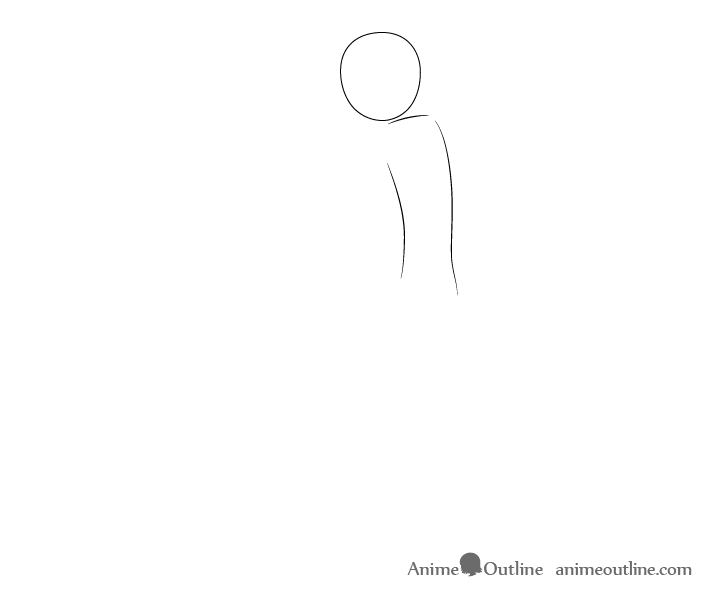
Step 2 – Draw the Caput
Draw the caput tilted slightly backwards but not as much every bit the torso as the character will generally be looking frontward/at the boot foot.
Step iii – Draw the Legs
Draw the kicking leg raised and slightly bent with the other leg pretty much directly on a slightly angle. You tin can draw the kicking foot bent slightly backwards with the other foot apartment on the basis.
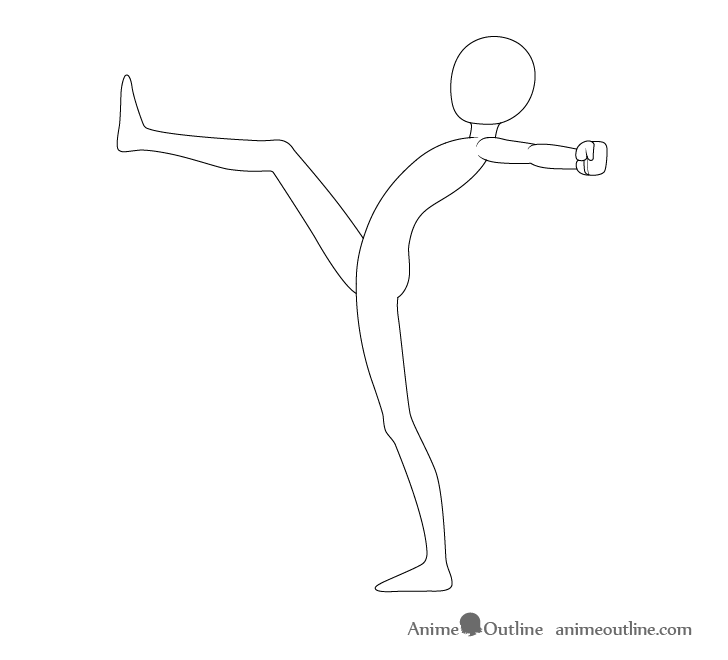
Pace 4 – Draw the Arms

The arms or arm in this example will be facing backwards and slightly towards the viewer. To show this draw each of it'southward parts shorter than if you were only looking at directly from the side. Make the first than normal with at thicker than normal wrist. This will show a piddling bit of perspective where objects closer to the viewer appear larger.
For more on perspective drawing run into:
Perspective Drawing Tutorial for Beginners and How it Relates to Anime
Step v – Draw the Cervix
Describe the neck angled slighlty backwards.
Step 6 – Draw the Chest Details

Draw the chest adequately flat as it will be stretched out and squeezed by the clothes.
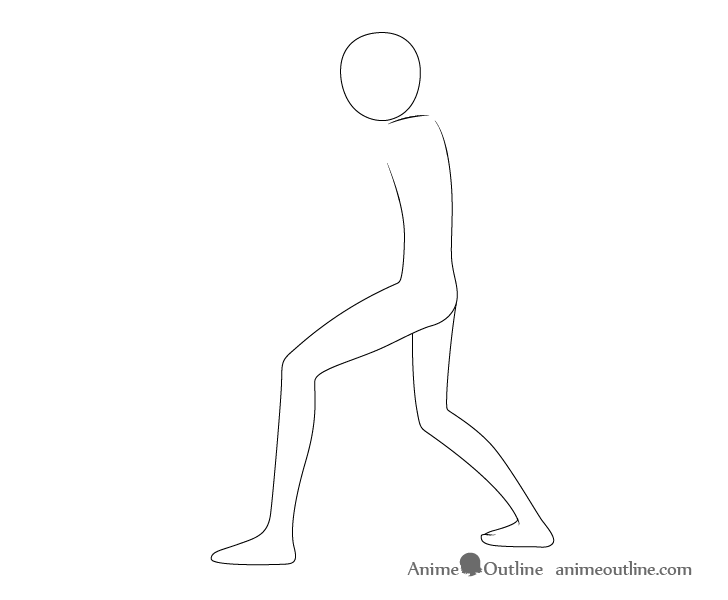
Drawing a Aiming Pose

This pose is of a grapheme aiming a gun. It can be common for a scenes similar special forces storming a building.
In this case the gun is a fairly big burglarize but a similar pose tin also work for a manus gun. You would just need to change the position of the arms.
Step 1 – Draw the Torso
For this pose the graphic symbol will be facing the viewer with a 3/4 view of their back.
Draw the torso with a bit of a bend to show that they are leaning forrad.
Step 2 – Draw the Head
Draw the head lowered and very slightly tilted forward to show that the character is aiming.
Footstep three – Draw the Legs
Depict the legs bent and a good altitude apart with the feet flat on the ground. This will give the pose a stable advent. This stability is more often than not needed to compensate for the recoil in case they have to burn down the gun.
Step four – Depict the Gun
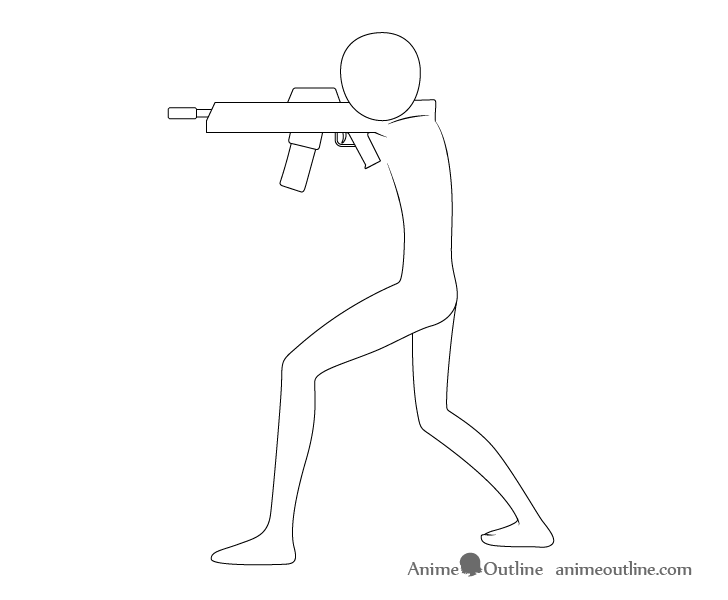
You can pretty much draw any burglarize design y'all similar for this pose as long as the shape is non too unusual. Position information technology so that it'due south stock is pressing upwardly against the shoulder expanse.
Step v – Draw the Arms
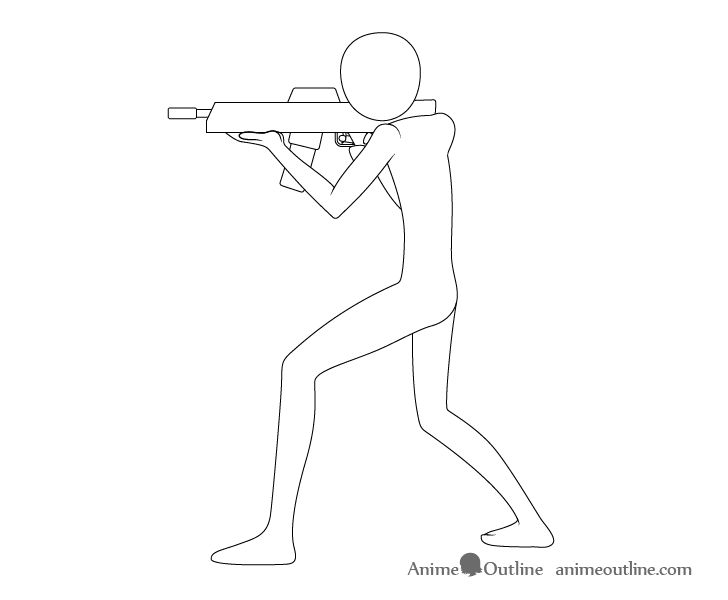
In one case the rifle is fatigued you tin draw the arms over superlative of information technology and erase the parts covered by them after. The placement of the artillery will exist determined by the shape of the rifle.
In this example ane arm is on the handle and i arm close to the front.
While for most of the poses the hands are fatigued every bit mittens for this particular pose you can really draw out the trigger finger while still combining the rest.
For an up close example of how to draw a hand holding a gun run across:
half-dozen Means to Draw Anime Hands Holding Something
Step 6 – Draw the Neck/Breast Details
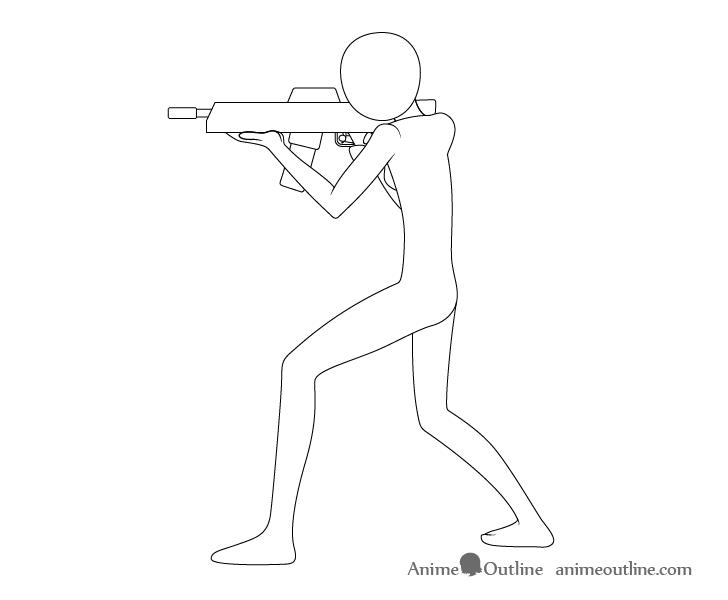
Finally you can add the cervix (tilted forward) and a just a tiny bit of the breasts every bit they will be turned slightly away form the viewer.
Drawing a Throwing Pose
This is a light/playful throw kind of pose where the graphic symbol is not really existence ambitious.
Stride 1 – Draw the Torso
Depict the torso virtually horizontal to the ground with a slight backwards bend. It will also take a bit of a twist that you can show by making it wider at the summit and narrower towards the the heart curving inwards on both ends just more so at the dorsum.
Step 2 – Draw the Caput
Describe the head tilted dorsum (in relation to the torso) so that the grapheme is pretty much looking forward.
Step 3 – Depict the Legs
Draw the forepart leg very lightly bent with the back leg aptitude and lifted off of the ground. Make the foot of the forepart leg either be fully alight to the footing or just barely exist on information technology'south toes. The foot of the back leg tin can pretty much be in a relaxed state.
Step four – Draw the Artillery
Draw the throwing arm facing forward at about a 45 degree angle and the other arm facing backwards in pretty much the reverse direction.
Make the fingers of the open up arm point forward and the thumb downward. This volition create that "just threw something" gesture. You can describe a niggling more item of the fingers in this pose equally they are important in showing the throw.
Draw the other paw in a more than relaxed state with its fingers slightly bent.
Pace 5 – Describe the Neck

Depict the neck pretty much in line with the upper part of the torso or tilted but a petty flake backwards in relation to information technology.
Step 6 – Depict the Breast Details
Draw the breasts slightly towards the throwing arm to show the body is being viewed on an bending.
Drawing a Leaping Pose
This is a dramatic looking leap pose that is somewhat like to the ballet pose but with a few differences.
Step 1 – Draw the Torso
Depict the body tilted forwards only leaning backwards.
Step 2 – Draw the Caput
Depict the head tilted slightly backwards.
Step 3 – Draw the Legs
Make the forward food bent with it's knee pointing forward and draw the back leg stretching out backwards. Draw the toes on both feet pointing down like a ballet dancer.
Step 4 – Depict the Artillery

Draw the arm/artillery stretched backwards with the palm of the paw pointing upwards. Y'all will observe that only one arm is shown every bit the 2nd arm can exist hidden behind the first one.
Step five – Draw the Cervix

Describe the cervix tilted slightly backwards.
Step six – Draw the Breast Details
The chest in this pose will exist only lightly stretched and facing just a tiny flake towards the viewer instead of directly frontwards.
Drawing a Flying Kicking Pose
This type of flying kick pose can be used in martial arts/anime manga besides every bit one-act.
Step 1 – Draw the Torso
Describe the torso at about a 45 degree angle. In this pose information technology volition have a bit of a curve and twist. Show this by making information technology narrower in the middle with both sides curving inwards (more so at the back).
Footstep 2 – Draw the Caput
Describe the caput tilted slightly forrad equally in this pose the character will generally be looking at the target of the kick.
Step iii – Describe the Legs
Draw the kicking leg stretched forward with the other leg angle then that it's knee points slightly in the opposite direction of the kicking.
You lot will want to draw the upper surface area of the leg (above the knee) shorter to show that it'due south pointing towards the viewer.
Describe the foot of the kick leg pulled back facing forward with information technology'southward heel and draw the foot of the other leg pointing forward with it's toes.
Stride 4 – Draw the Artillery

Draw the arm closer to the viewer pointing backwards with a slightly bend. To prove the bend you lot tin can make the elbow to wrist expanse just a tiny flake shorter than normal with the elbow beingness but a tiny bit wider.
Step 5 – Draw the Cervix
In this case the neck will be barely visible every bit a big part of it will be covered by the shoulder/arm.
Pace 6 – Draw the Chest Details
With this item twist of the trunk the chest will be viewed from the side. This means yous tin can draw the breasts as just ane crash-land. Again keep in heed that the chest volition also be squeezed by the clothes and so it should be adequately apartment.
Conclusion
Drawing poses can be very complicated. To make the cartoon procedure simpler get-go fatigued your characters in the poses you lot want with every bit few details equally are needed to convey the pose. You can add the article of clothing, pilus, facial features and other details afterwards.
When drawing the poses try and call back of the various body parts and how they would move in that particular activity or stance. You can also use reference material such as photos or the piece of work of other artists.
For more than similar tutorials as well come across:
- How to Depict an Anime School Girl in 6 Steps
- How to Draw an Anime Boy Total Body Step past Step
Source: https://www.animeoutline.com/how-to-draw-anime-poses-step-by-step/
Posted by: mallarduntes1948.blogspot.com
0 Response to "How To Fight Like An Anime Character"
Post a Comment